
Painting Kitchen Cabinets
/When we first toured our house, I knew it was going to be our first home. I also knew the kitchen needed a complete make-over. I even said so during that first tour. Who declared orange oak to be THE thing to use in homes anyway?? Plus, our kitchen is in the middle of the downstairs with no windows (we went for a townhouse). It felt dark. An orange-y kind of dark. See?


After a bit of research, I learned that if you plan on a total kitchen overhaul then you should start with the cabinets. I know a few were hesitant when I told them this because of horror stories where counter installation ruins new cabinets. What I found was that such things rarely happen. I was willing to take that risk and loved the wild abandon that I had while painting my cabinets. I wasn't the least but worried about getting paint on the counter tops because I hate those counter tops.
So I'm going to tell you how we did it. There are probably better ways but this is what suited us. I work M-F like most, and Alvin works T-Sat. This means we only have Sundays together so we knew this would never be a weekend project for us. We took a more casual route and tackled two or three cabinets a week. Sometimes less because we don't have a garage so sanding was completely determined by the weather. It took a long time but it worked for us.
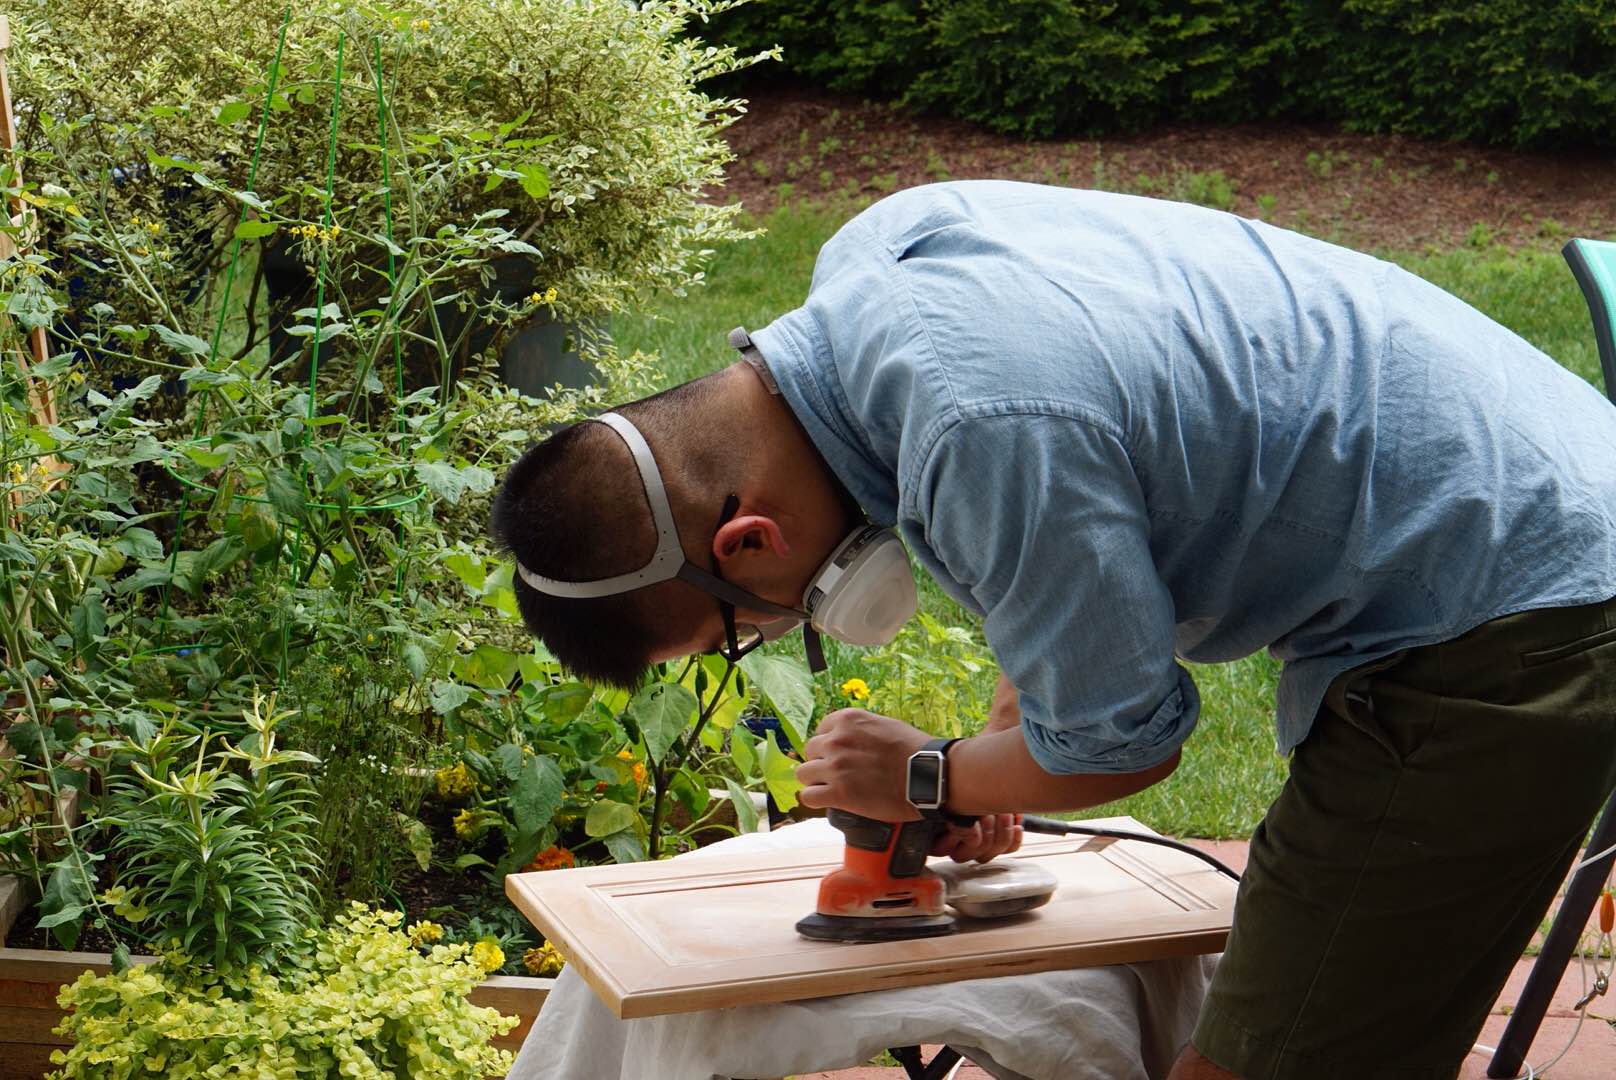
For the doors, we took them down and removed all of the hardware. Then we sanded them down using the Black and Decker mouse until you could no longer see or feel any glossy spots. This normally meant we got it all the way down to natural wood again. Saw dust is hazardous so if you plan on this type of project be sure to get a good face mask! Alvin has Asthma but found that this one worked wonders!
I then painted it in HGTV Home by Sherwin-Williams' Greek Villa. This lighter color needed three coats, front and back. This is more of a cream than a white. I originally picked three white shades and the other two ended up looking blue in our home. This is why it's always good to take those samples home first! Can you imagine painting your entire kitchen "white" only for it to look fluorescent blue?! I also chose to paint it using a flat paint which is purely a personal preference.
After the paint dried I used Krylon Matte finishing spray. Admittedly this product is made for painted furniture and the like, however the Lowe's guy said cabinet sealant can create a yellow tint so I steered clear of that. So far so good with the Krylon stuff but I'll come back and edit this if something goes awry.
After many lackadaisical weeks of cabinet door painting, we finally had a four day weekend together! Woo hoo! We didn't do the fun thing and go to the beach for the 4th but we did get the kitchen finished. :) We started by taping plastic to everything.

Side story! Obviously we couldn't fix lunch with the kitchen looking like this so we decided to try out Panera's new delivery service. It arrived WAY before the ETA and we were unprepared. By unprepared I mean from our glass door he saw a room covered in plastic. Then a person appear out of that plastic with what looks like a gas mask on and goggles. Poor delivery guy said we scared the sh*t out of him! Whoops! He clearly watches too many horror films. Anyway...back to DIY projects!
After the taping was completed we each took our respective sanders and got to work. I used the B&D Mouse sander to tackle the little groves in the doors we couldn't take off. Alvin used a B&D circular sander to cover the flat surfaces. Between the two of us it took about an hour and a half to sand it all down. Then four hours of painting! Probably could have been less if you have two skilled painters in the house. Poor Alvin can't paint. He has tried many times since we bought the house but he really just isn't good. Thus four hours of painting for Aryn. Totally worth it for this much brighter kitchen though!

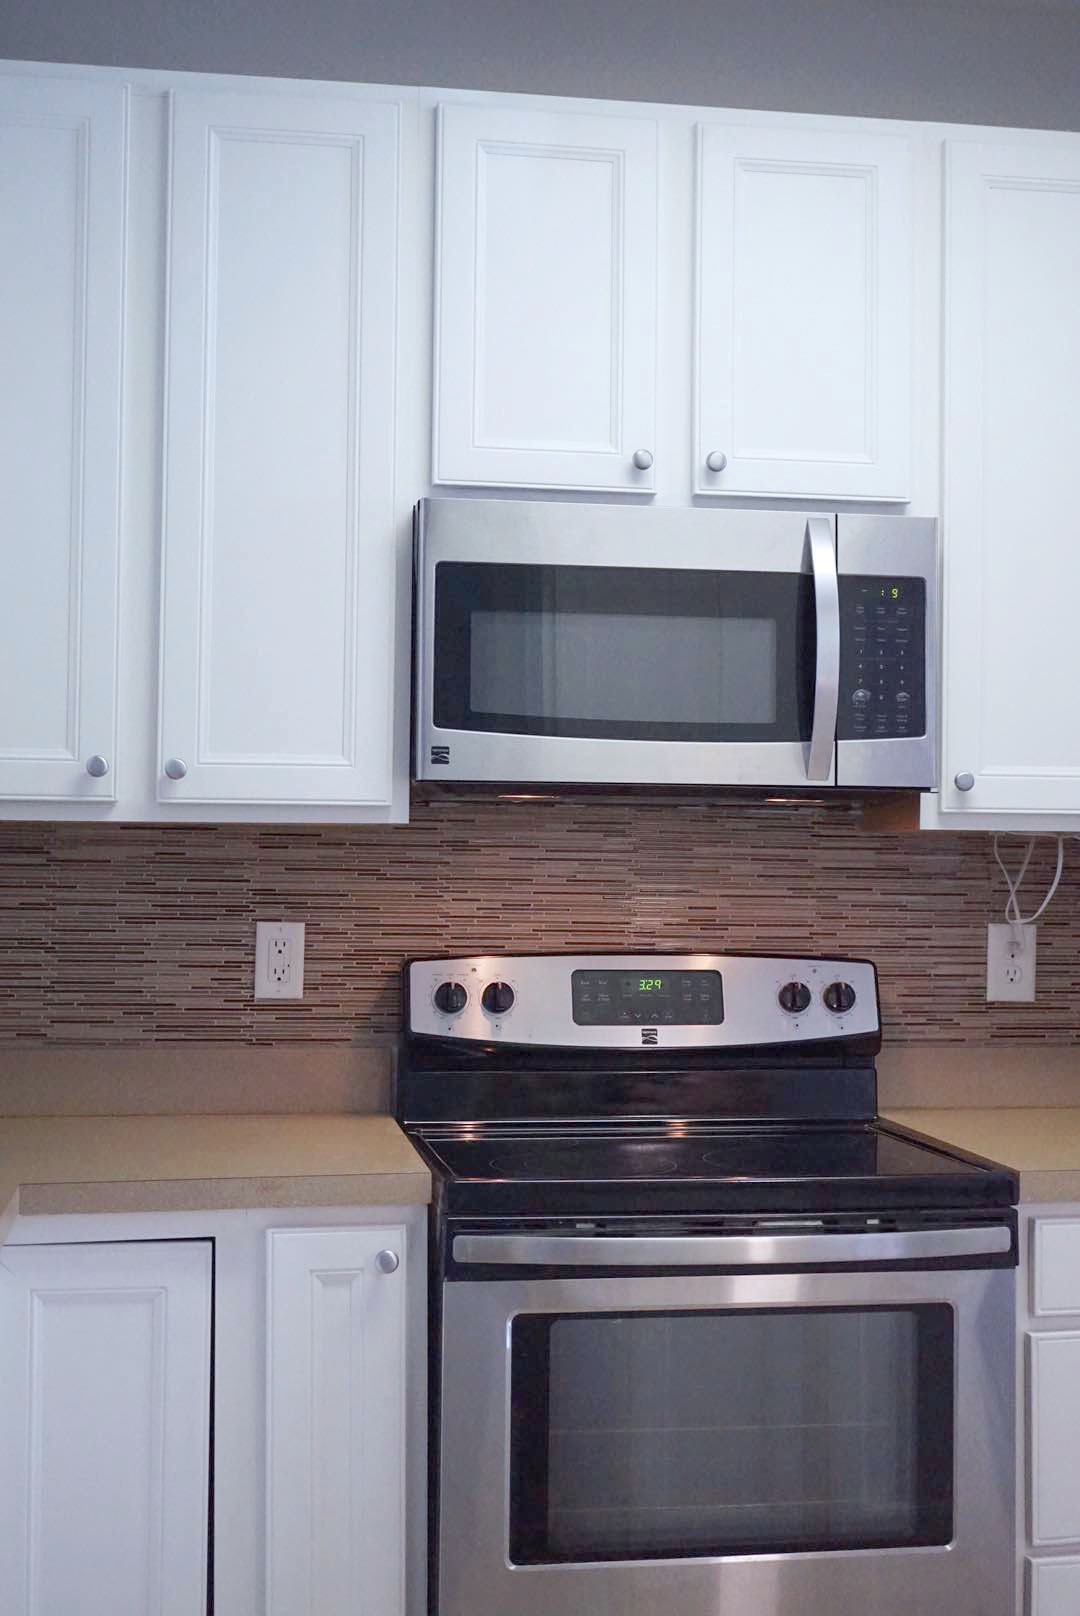

As you can see, this DIY project is not for the faint of heart. We were pretty casual about ours, painting a few cabinet doors a week until the final weekend when we completed it all. I also really enjoy painting things so it wasn't too bad for me. Alvin says he'll never do it again. It was totally worth it to me so yes, if I end up in another house with orange cabinets I will do this all over again.
Here are some pros and cons of DIYing your cabinets.
Pros:
- Cheaper. So much cheaper. If you are planning on selling your home in the next year or two I highly recommend this project! It's not too expensive but will make your kitchen much more appealing to today's buyers. White and bright are in. Here's the total cost:
- $50 for a gallon of HGTV Showcase paint. It's stain resistant. Key in kitchens.
- ~$30 sanding pads, give or take.
- $30 Black and Decker orbital sander, I'm not including the B&D Mouse sander because I use that for a bunch of projects and already had it.
- $18 plastic sheets to cover the kitchen
- $25 3M Paint Project Respirator, times two since we each had one.
- Total: $178
- More control over time frame.
- Don't need to work out schedules for contractors to be in the home/no need to board any pets.
Cons:
- It's work. Hard physical labor.
- Unlikely you could safely do this with children in the house due to saw dust and paint fumes.
- You lose a weekend of free time, at least.
So there you have it! Stay tuned for our DIY banister project!